11/4/10

Recycled Pony or Plastic Bead Lampshade.....


All beaded & ready to bake!
 

15 mins in @ 350, things are gettin' mushy...


Half-hour or so in...


45 mins (?)... is that creamed corn?...
(I had to dremel the center hole out once it cooled, 'cause it closed a tad too much Wink)


The old shade is good for something finally...a mold for the new shade...


Glittery beads rule my world...

11/3/10

Washer Jewelry Tutorial


I saw this tutorial on DIY Creative Juices over a year ago and it has been one of my favorites.  I used this craft in our last MOPS meeting.  Here is what you need.

Some of my instructions have changed over the year.  I also want to mention that you also need some craft glue of some sort that was not in this picture.  I was trying this mod podge product "dimensional magic" instead of judkins diamond glaze. (my opinion:  i like diamond glaze better but for availability and price the mod podge product worked fine for 4.99 at hobby lobby)
ON WITH THE TUTORIAL:  You will need to trace your washer on your scrapbook paper of choice and cut it out.  Use an exacto knife to cut the center circle.

Then you will use the craft glue which i used tacky glue but i have used regular mod podge before to adhere the paper to the washer.

You will need to let it dry.  By the way the picture above is the washer with the glue and the paper was put on directly after.  You don't need to put glue on top of the paper afterwards. Once this is dry I like to sand the edges.  I am pretty rough with my sand paper because i like the scuffed look.  You do this so there is no paper hanging over the edge of the washer which could cause your paper to eventually peel off.

Now you are ready to apply the dimensional magic or diamond glaze.  You want to be somewhat generous with this especially if using the dimensional magic it is not quite as thick as the diamond glaze.

Use a brush to push the glaze to the edges. It looks blue but dries clear.  It takes about 2-3 hours to dry.  Then you can put it on a string.  For this craft I found these snap clasps.  I tied cording to the hoops on them.

Finally put your washer on the necklace.  You can make these two sided too so you get two necklaces in one.  I have also attached rhinestones to them to give another layer to the necklace.  And if you play washers (the game) why not play in style;) I think that would be a great Fathers Day gift for my dad!!


10/31/10

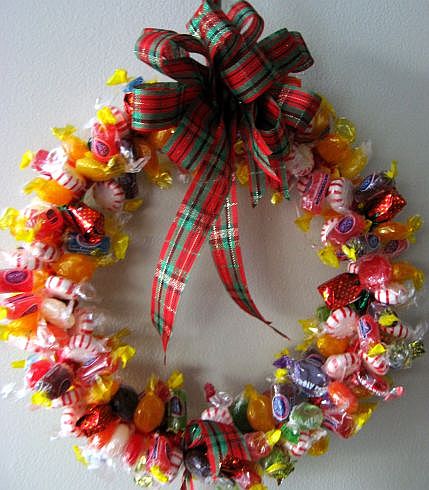
How to Recycle halloween candy into a Xmas wreath!


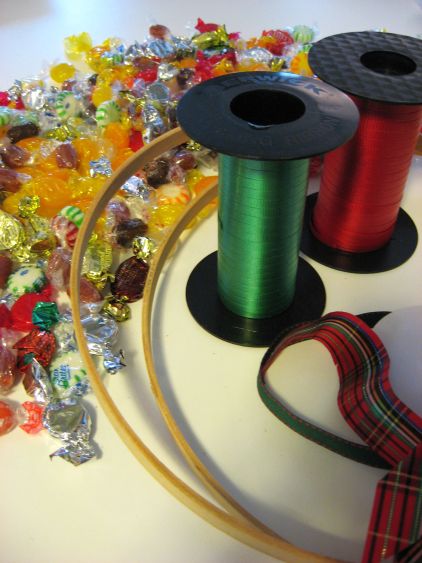
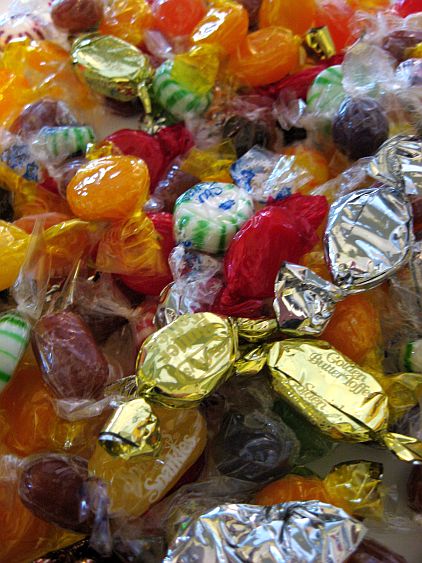
First you need curling ribbon, some pretty ribbon to make a bow, a small pair of scissors, an 8" or 9" embroidery hoop, spray paint or colored electricians tape and 3 lbs of hard candy.
You can also use the part of embroidery hoop with the metal closure-- just tape over the metal part to secure it together and make sure you place it at the bottom when hanging.


Did I mention loads of candy


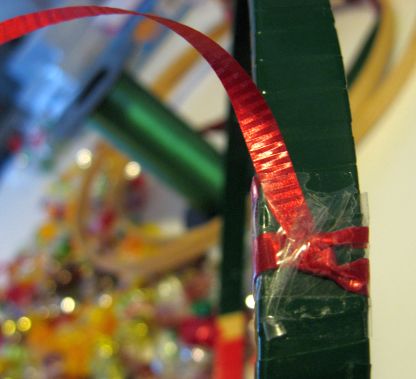
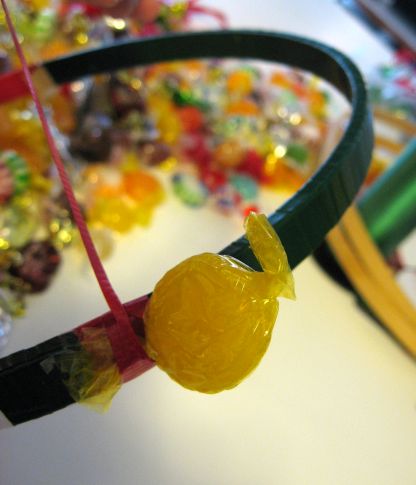
First paint or cover your hoop with colored electricians tape (makes it a little prettier as the candy is removed).  Begin by tying about a 2 yard piece of curling ribbon to the hoop and then covering the knot with tape.


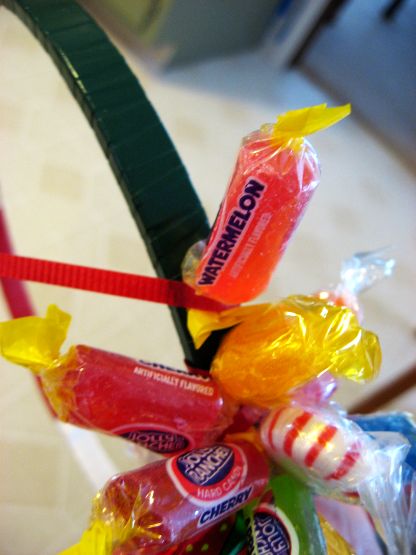
Place a piece of candy on the hoop and tightly wrap the curling ribbon around the hoop catching the tail of the candy wrapper


Continue wrapping the candy to the hoop.  If the curling ribbon runs short tie off the ribbon to the hoop and tie on another piece and begin again.  Wrap the candy as close together as you can so you have a full wreath.


10/25/10

Create a Fun Cocktail Ring Out of Buttons!


Materials:
• Button with a shank
• Metal file
• 1 mm elastic rubber banding
• Cutting tool
• 20-30 Seed beads
• 2 mm crimp bead
• Crimping tool
Step 1. Choose a button that has a shank.
A shank is a protruding ring on the back of the button. Sometimes the shank can be sharp. Be sure to file it with a metal file to smooth it down.


Step 2. Measure a length of elastic to fit the finger for the ring.
Choose 1 mm elastic banding. Anything smaller will be break easily and anything larger will be too big for the seed beads. Give yourself enough extra tail to be able to pull the elastic through the crimp bead later.


Step 3. Thread the seed beads through the elastic, the button shank, and the crimp bead.
Use 20 or so seed beads. (Seed beads are the small beads. The crimp bead is the small metal bead.)
Step 4. Thread the opposite end of the elastic through the crimp bead from the other end to form a circle.
Don’t let go of the tail as you thread the opposite end through the crimp bead.
Step 5. Pull tight and check the size one more time.
If you need to make adjustments by adding or removing seed beads, this is the time.


Step 6. Crimp the bead by squeezing it flat using the crimping tool. Then crimp the bead again in half. Trim the extra thread as close as possible to the crimp bead.
You are finished!

10/23/10

The Thankful Tree - Table Top Tree


Materials
Flower pot
Fine sand
Thin, bare tree branch
Sheets of craft foam (orange, yellow, red)
Safety scissors
Thin Sharpie marker
Hole punch
String or fishing line

  1. Fill the flower pot with sand
  2. Set the tree branch firmly in the sand.
  3. Cut leaf shapes out of craft sheets.
  4. Have your family write or draw a picture of what they are thankful for on each hand print or leaf.
  5. Punch a small hole in each leaf.
  6. Using string or fishing line, attach each leaf to the “tree”.
  7. Place the Thankful Tree on your dinner table or buffet and use it to count your blessings on Thanksgiving Day.

10/21/10

Make a scrap-yarn-wrapped branch decoration!

yarn branch art piece thing


 All you need for this project are some branches/twigs (the size and amount that you want for your vase or other arrangement plan), yarn leftover scraps, glue, and scissors.

To change colors, when you have about 3-4 inches of your first color left, hold the tip of the next color alongside the branch.  Wrap the last 2-3 wraps of the first color around the end of the next color:

howto01 howto02

Hold the end of the first color against the branch, and start wrapping with the next color over the first color, wrapping over the tip to hold it down:

howto03

When you reach the end, cut the yarn when it’s wrapped all the way to the top, then unwrap a couple times around, dot some glue on the branch end, and wrap back over the glue.


closeup2 closeup1

By the way, I do recommend doing this project over newspapers – the little twig dust gets everywhere on your workspace, so newspaper makes for easy cleanup!
If you do snap an offshoot after wrapping, like you can see I did below, you can glue it back together, twisting it to get the wrapping back in place as much as possible.

brokencloseup1

So, just keep on wrapping until you’ve wrapped all the branches you want…

finishedbranches


yarn branch art piece thing


yarn branch art piece thing


yarn branch art piece thing


scrapbranch1